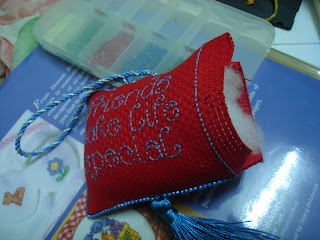
Psttt..pls close one eye when you're looking at the wrong side of the stitching. It is a nightmare..*grin*

This is the item u need ..Stitched piece (both sides), a cording and a tassel.

I usually will stitched beforehand cording and tassel on each piece before assembled( like the picture above)to make it more secure.

Then slowly stiched the two piece together , I used beads to add more zasss(hehehe). Leave an opening at the end to stuff some fiberfill inside. Then closed. There you go..pillow is ready for a show off.
3 comments:
Sis Index... Ok je nampak tassel tu. look very nice dan kemas. Tu dari pandangan kamera/gambar le. hehehe. me love your way of finishing the stitcher's tool....
tq dania..dont let the camera fool you..hehehe..Tassel tu Benang RM la..no confidence yet to do it myself. kena trial dgn benang Venus dulu rasanyer ni..ekekeke
rasa hari tu dah letak tutorial on tasselkan. ekceli benang tu pun effect kat tassel taw. kalau guna silk floss memang cantik nak mampuih.. hehehe kalau guna floss biasa memang la cam tak ermm siap/kemas..owhh tu tassel RM ek... cuba try wat ngan floss rayon. atau benang Funny bunny tu. hehehehe. nama baru. benang funny bunny
Post a Comment